Looking for a fun and healthy treat? These Blueberry Lemon Yogurt Popsicles are fresh, easy, and perfect for hot days. With just a few simple ingredients, you can create a delicious dessert that everyone will love. I’ll guide you through making these tasty pops, from selecting the right yogurt to customizing flavors. Dive in to learn how to whip up your own batch and enjoy a refreshing treat!
Why I Love This Recipe
- Refreshing Flavor: The combination of blueberries and lemon creates a bright and refreshing taste that’s perfect for hot days.
- Healthy Ingredients: Made with yogurt and fresh fruit, these popsicles are a guilt-free treat that packs a nutritional punch.
- Customizable Sweetness: You can adjust the sweetness to your liking by modifying the amount of honey or maple syrup used.
- Simple to Make: With just a few ingredients and minimal prep time, these popsicles are easy to whip up and perfect for any skill level.
Ingredients
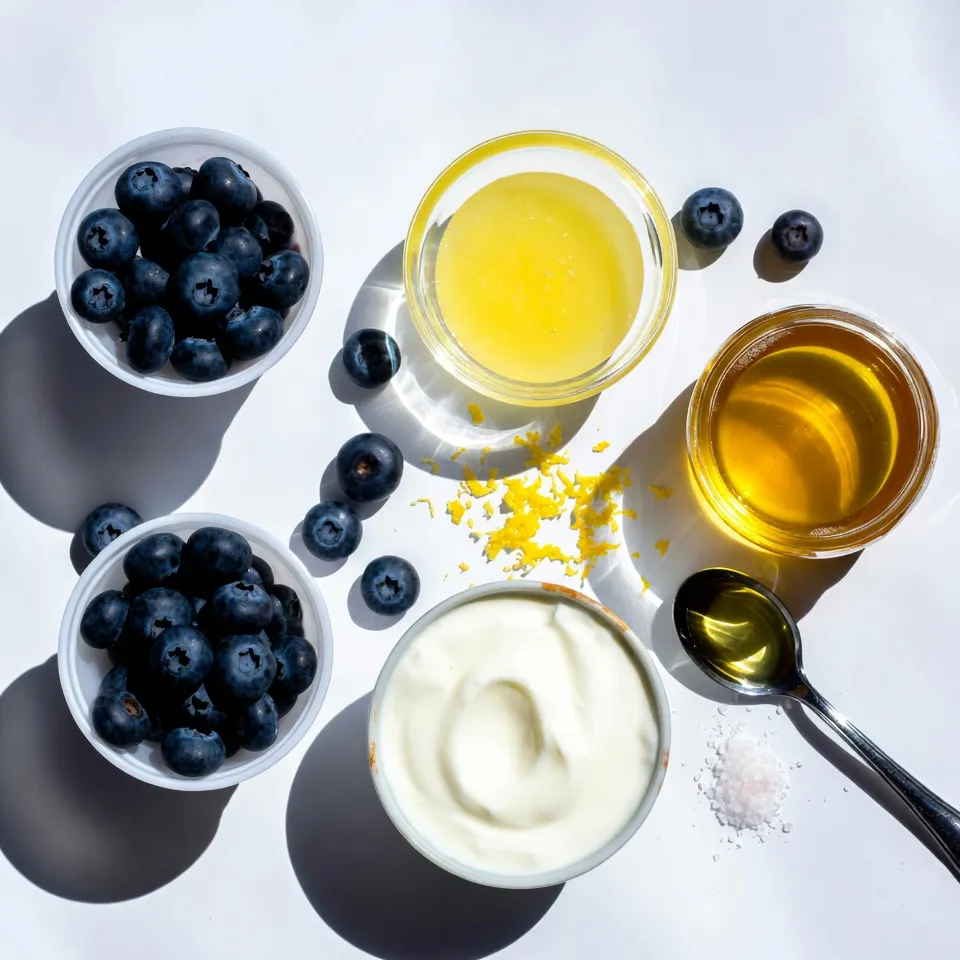
Fresh Blueberries
Fresh blueberries are the star of this recipe. They bring flavor and a bright color to the popsicles. You need 2 cups of these juicy berries. Look for firm, plump berries with a deep blue color. If you find some that are a little soft, use them in smoothies instead.
Yogurt Selection (Greek vs Regular)
You can choose between Greek yogurt or regular yogurt. Greek yogurt gives a thick and creamy texture. It also packs more protein. Regular yogurt is lighter and tangier. Use 1 cup of either. I often prefer Greek yogurt for its rich taste, but both work well.
Sweetener Options (Honey or Maple Syrup)
For sweetness, you can use honey or maple syrup. The recipe calls for 1/2 cup. Honey adds a floral note, while maple syrup offers a warm flavor. Adjust the amount to your taste. If you like it sweeter, add a bit more.
Step-by-Step Instructions
Preparing the Mixture
To start, gather your ingredients. You need fresh blueberries, yogurt, honey or maple syrup, lemon juice, lemon zest, vanilla extract, and a pinch of salt. In a blender, combine all these ingredients. Blend on high speed until smooth and creamy. You can blend until it’s completely smooth or leave some blueberry chunks for a fun texture.
Taste the mixture. If you want it sweeter, add more honey or syrup, then blend again. This step ensures your popsicles taste just right!
Filling the Molds
Next, it’s time to fill the molds. Pour the blueberry mixture into your popsicle molds. Fill them about three-quarters full. This leaves space for the mixture to expand when it freezes.
Don’t forget to insert popsicle sticks into the molds. This will make it easy to hold later.
Freezing Process
Now, place the molds in the freezer. Let them freeze for at least four to six hours. You want them to be completely set before you take them out.
When they are ready, run the molds under warm water for a few seconds. This helps release the popsicles easily. Now, you can enjoy your refreshing blueberry lemon yogurt popsicles!
Tips & Tricks
Achieving the Perfect Consistency
To get that creamy texture, blend the ingredients well. Use high speed for a smooth mix. If you like some texture, leave a few chunks of blueberries in. This gives your popsicles a nice bite. If your mix is too thick, add a bit more yogurt or lemon juice. This can help make it easier to pour.
Customizing Sweetness
The sweetness can change based on your taste. Start with half a cup of honey or maple syrup. After blending, taste the mix. If you want it sweeter, add more sweetener. Just remember to blend again to mix it well. You can always use less sweetener if you prefer a tart flavor.
Easy Ways to Remove Popsicles from Molds
When it’s time to eat your popsicles, remove them carefully. If they stick, run warm water over the outside of the molds. This warms the sides and helps the pops slide out. Hold the stick and gently pull. If they don’t budge, give it another moment under warm water. Enjoy your delicious treat!
Pro Tips
- Choose Ripe Blueberries: For the best flavor, select ripe, plump blueberries. They should be deep blue and slightly soft to the touch.
- Adjust Sweetness: Taste the mixture before freezing and adjust the sweetness according to your preference. Remember, the sweetness may mellow after freezing.
- Use Silicone Molds: Silicone popsicle molds make it easier to release the popsicles once they’re frozen. They provide a good grip and flexibility.
- Experiment with Add-Ins: Add chopped mint, a splash of coconut milk, or even a handful of spinach for a unique flavor and added nutrition.
Variations
Adding Additional Fruits (e.g., Strawberries, Raspberries)
You can make these popsicles even more fun by adding other fruits. Strawberries and raspberries pair well with blueberries. Simply chop them into small pieces and mix them in. You can also blend them into the yogurt mix. This adds color and flavor to your pops. Try different combinations to find your favorite!
Using Different Yogurt Flavors
While plain yogurt works great, you can switch it up. Use flavored yogurt for a twist. Vanilla, lemon, or even coconut yogurt can add a nice touch. Just remember, flavored yogurt may change the sweetness. Taste your mix before pouring it into molds to ensure it’s just right!
Incorporating Herbs (e.g., Mint or Basil)
Herbs can add a fresh taste to your popsicles. Mint works well with blueberries and lemon. Just chop a few leaves and mix them into your yogurt blend. Basil can also add a unique flavor. This twist makes your popsicles stand out and taste amazing! Try it and see how herbs can elevate your treat.
Storage Info
Best Practices for Storing Popsicles
I love to store these blueberry lemon yogurt popsicles properly. First, make sure they are fully frozen. Once they are ready, take them out of the molds. Wrap each popsicle in plastic wrap or place them in a freezer bag. This keeps them fresh and protects them from ice crystals. Label the bag with the date. This way, you won’t forget when you made them!
Shelf Life in the Freezer
These popsicles can last up to two months in the freezer. They taste best when eaten within the first month. After that, they may lose some flavor and texture. Always check for any signs of freezer burn before enjoying them. If they look good, they should still be tasty!
Thawing Tips for Best Texture
When you’re ready to eat a popsicle, take it out of the freezer. Let it sit for a minute or two. This helps soften the popsicle just enough to enjoy. You can also run warm water over the outside of the mold for a few seconds. This makes it easier to pull the popsicle out without breaking it. Enjoy every bite of your refreshing treat!
FAQs
How long do these popsicles take to freeze?
These popsicles take about 4 to 6 hours to freeze completely. I recommend waiting the full time. This ensures they are firm and easy to remove from the molds. If you try to take them out too soon, they may fall apart.
Can I use frozen blueberries instead of fresh?
Yes, you can use frozen blueberries. Just remember to let them thaw a bit. Thawed blueberries blend well and still taste great in the popsicles. They might make the popsicles a bit darker in color, but the flavor stays delicious.
What are the health benefits of blueberries and yogurt?
Blueberries are packed with vitamins. They are low in calories and high in fiber. This makes them great for digestion. Yogurt provides protein and probiotics. Probiotics help keep your gut healthy. Together, they make a tasty and nutritious treat that you can enjoy guilt-free!
These blueberry yogurt popsicles are easy to make and fun to enjoy. You start with fresh blueberries, choose your yogurt, and pick a sweetener to match your taste. Follow clear steps to mix, fill, and freeze. Remember to use tips for perfect popsicles. You can even change flavors by adding other fruits or herbs. Store them right, and they’ll last a while. I hope you feel inspired to try these delightful treat