Looking for a fun and tasty snack? You’ve found it! Jalapeño Cheddar Pretzel Bites are simple to make and filled with flavor. This easy recipe combines spicy jalapeños and sharp cheddar cheese, making each bite a delight. Whether for a party or a cozy night in, these pretzel bites will impress everyone. Let’s dive into the ingredients you need and how to make these delicious treats!
Why I Love This Recipe
- Bold Flavor: The combination of sharp cheddar and spicy jalapeños creates a delightful burst of flavor in every bite.
- Easy to Make: With simple ingredients and straightforward steps, these pretzel bites are easy enough for any skill level.
- Perfect for Sharing: These bite-sized treats are ideal for parties, game days, or just a fun snack with friends and family.
- Customizable: Adjust the spice level by adding more or fewer jalapeños, or experiment with different types of cheese!
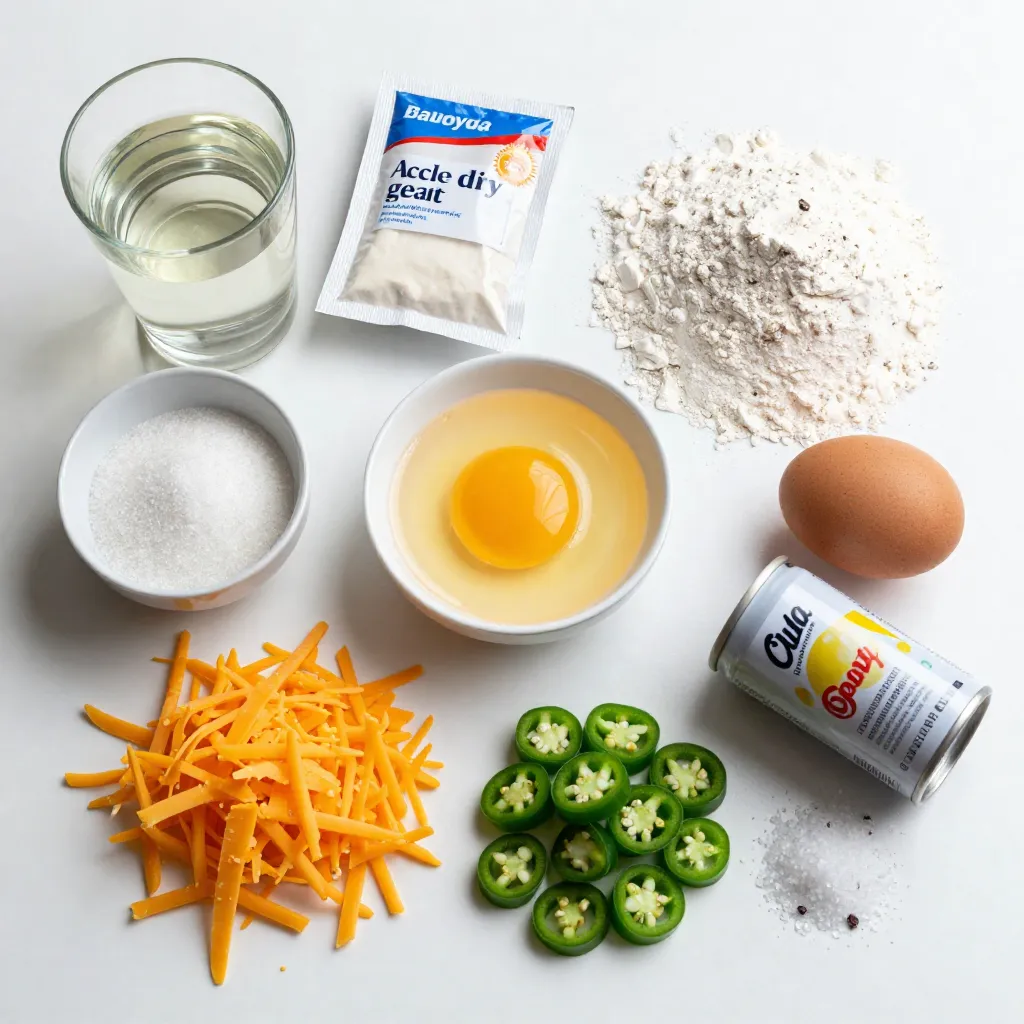
Ingredients
Dry Ingredients
– 4 cups all-purpose flour
– 2 tablespoons granulated sugar
– 1 teaspoon coarse sea salt
– ½ cup baking soda
Wet Ingredients
– 1 ½ cups warm water (110°F – 115°F)
– 2 ¼ teaspoons active dry yeast (1 packet)
– 1 large egg (beaten)
Flavor Components
– 1 cup sharp cheddar cheese, shredded
– 1-2 jalapeños, finely chopped (adjust for spice preference)
– Cooking spray for greasing
– Flaked sea salt for topping
Gather these ingredients before you start. The dry ingredients create the dough’s base. The warm water helps activate the yeast. You can adjust the jalapeño amount to fit your spice level. The cheese adds a rich flavor. Flaked sea salt gives the bites a nice crunch. Cooking spray will keep everything from sticking.
Step-by-Step Instructions
Preparing the Dough
1. In a mixing bowl, combine 1 ½ cups of warm water, 2 tablespoons of sugar, and 2 ¼ teaspoons of yeast. Let it sit for about 5 to 10 minutes until it froths.
2. In a large bowl, mix 4 cups of flour and 1 teaspoon of coarse sea salt. Create a well in the center. Pour the yeast mixture into this well.
3. Stir until the dough begins to form. Knead the dough on a floured surface for about 5 to 7 minutes until it feels smooth.
Rising and Shaping
1. Place the dough in a greased bowl. Cover it with a damp cloth and let it rise in a warm area for about 1 hour, or until it doubles in size.
2. Preheat your oven to 450°F (232°C). Line a baking sheet with parchment paper.
3. Once the dough has risen, punch it down. Divide it into 12 equal pieces. Roll each piece into a rope about 1 inch thick. Cut the rope into bite-sized pieces.
Boiling and Baking
1. In a large pot, bring 10 cups of water to a boil. Add in ½ cup of baking soda.
2. Carefully drop a few pretzel bites at a time into the boiling water for 30 seconds. Use a slotted spoon to remove them and place them on the prepared baking sheet.
3. Brush each pretzel bite with a beaten egg. Sprinkle flaked sea salt, some shredded cheddar cheese, and chopped jalapeños on top.
4. Bake for 12 to 15 minutes, or until they turn golden brown. Once baked, let them cool slightly before serving.
Tips & Tricks
Perfecting Dough Texture
– Kneading techniques for elasticity: Knead the dough for 5-7 minutes. Use a floured surface and push the dough with your palms. Fold it over and repeat. This builds the gluten, making the dough elastic and smooth.
– Optimal rising conditions: After kneading, place the dough in a greased bowl. Cover it with a damp cloth. Let it rise in a warm spot, like near a sunny window. The dough should double in size in about an hour.
Baking Tips
– Checking oven temperature: Preheat your oven to 450°F (232°C). Use an oven thermometer to ensure it’s accurate. This high heat helps create a crispy outer layer.
– Timing for perfect browning: Bake the pretzel bites for 12-15 minutes. Watch for a golden-brown color. If you prefer a darker crust, leave them an extra minute or two.
Serving Suggestions
– Pairing with dips like mustard or cheese: These pretzel bites taste great with spicy mustard or melted cheese. Experiment with different dips to find your favorite.
– Presentation ideas for gatherings: Serve the pretzel bites warm in a basket lined with parchment paper. You can also arrange them on a wooden board for a rustic look. A small bowl of dip adds a nice touch.
Pro Tips
- Use Fresh Jalapeños: For the best flavor and heat, use fresh jalapeños instead of jarred ones. Adjust the amount based on your spice tolerance.
- Knead Well: Kneading the dough properly develops gluten, ensuring your pretzel bites have the perfect chewy texture.
- Boiling Soda Solution: Boiling the pretzel bites in the baking soda solution gives them that signature crust and deep flavor. Don’t skip this step!
- Serve Warm: These pretzel bites are best served warm. Enjoy them fresh out of the oven for the ultimate experience!
Variations
Flavor Enhancements
You can easily enhance the flavor of your jalapeño cheddar pretzel bites.
– Spice adjustments with jalapeños: If you want more heat, add more jalapeños. For less spice, use fewer or remove seeds.
– Incorporating different cheeses: Swap sharp cheddar for mozzarella or pepper jack. This change can create a new twist on the classic flavor.
Dietary Modifications
Making these pretzel bites fit various diets is simple.
– Gluten-free flour alternatives: Use gluten-free all-purpose flour instead of regular flour. This choice makes your bites gluten-free and just as tasty.
– Vegan adaptations: Replace the egg with a flaxseed mixture. Use plant-based cheese to keep it vegan.
Serving Styles
You can serve these pretzel bites in fun ways.
– Bite-sized vs. traditional pretzel shapes: I prefer bite-sized pieces for easy snacking. However, making larger pretzel shapes can be a fun option for sharing.
– Serving with unique dips: Pair your bites with spicy mustard or a cheese dip. This adds extra flavor and makes them even more enjoyable.
Storage Info
Storing Homemade Pretzel Bites
To keep your jalapeño cheddar pretzel bites fresh, store them at room temperature in a sealed container. If you plan to eat them within a few days, this works well. For longer storage, put them in the fridge. Just remember, refrigeration can make them a bit tougher.
– Best practices for keeping them fresh:
– Let them cool completely before storage.
– Use parchment paper between layers to prevent sticking.
– Seal them tightly to avoid drying out.
Reheating Instructions
When reheating pretzel bites, the oven is your best friend. It keeps them crispy and delicious. Preheat your oven to 350°F (175°C). Place the bites on a baking sheet and heat for about 10 minutes.
– Oven vs. microwave methods:
– Oven: Best for crispiness.
– Microwave: Quick but can make them chewy.
To make them crispy again, skip the microwave and use the oven.
Freezing Guidelines
Freezing your pretzel bites is a great way to save them for later. Place them in a single layer on a baking sheet. Freeze them until solid, then transfer them to a freezer bag. They stay fresh for up to three months.
– Thawing and reheating tips:
– Thaw in the fridge overnight.
– Reheat in the oven at 350°F (175°C) for about 10-15 minutes.
– Enjoy them warm for the best taste!
FAQs
What are Jalapeño Cheddar Pretzel Bites?
Jalapeño cheddar pretzel bites are small, soft pretzel snacks. They have a chewy texture and a burst of flavor. The bites mix sharp cheddar cheese and spicy jalapeños. This combination gives them a tasty kick. They are perfect for sharing at parties or enjoying as a snack.
Can I make these pretzel bites ahead of time?
Yes, you can make these pretzel bites ahead of time. Prepare the dough, shape it, and then freeze the bites. To freeze, place them on a baking sheet and freeze until firm. Then, transfer them to a zip-lock bag. When you want to bake them, thaw in the fridge overnight, then boil and bake as usual.
Where can I buy Jalapeño Cheddar Pretzel Bites?
You can find jalapeño cheddar pretzel bites at local bakeries or specialty shops. Many grocery stores also sell frozen versions. If you prefer dining out, check local pubs or restaurants known for appetizers. They often serve freshly made pretzel bites with various dips.
In this post, we explored the joy of making Jalapeño Cheddar Pretzel Bites. We covered the key ingredients, from flour to cheese, and guided you through each step, from preparing the dough to baking. I shared tips for perfecting your bites and suggested fun variations. Remember, practice makes perfect, whether you prefer classic shapes or unique dips. Enjoy making these delightful snacks that your family and friends will love. Get ready to share your tasty creation