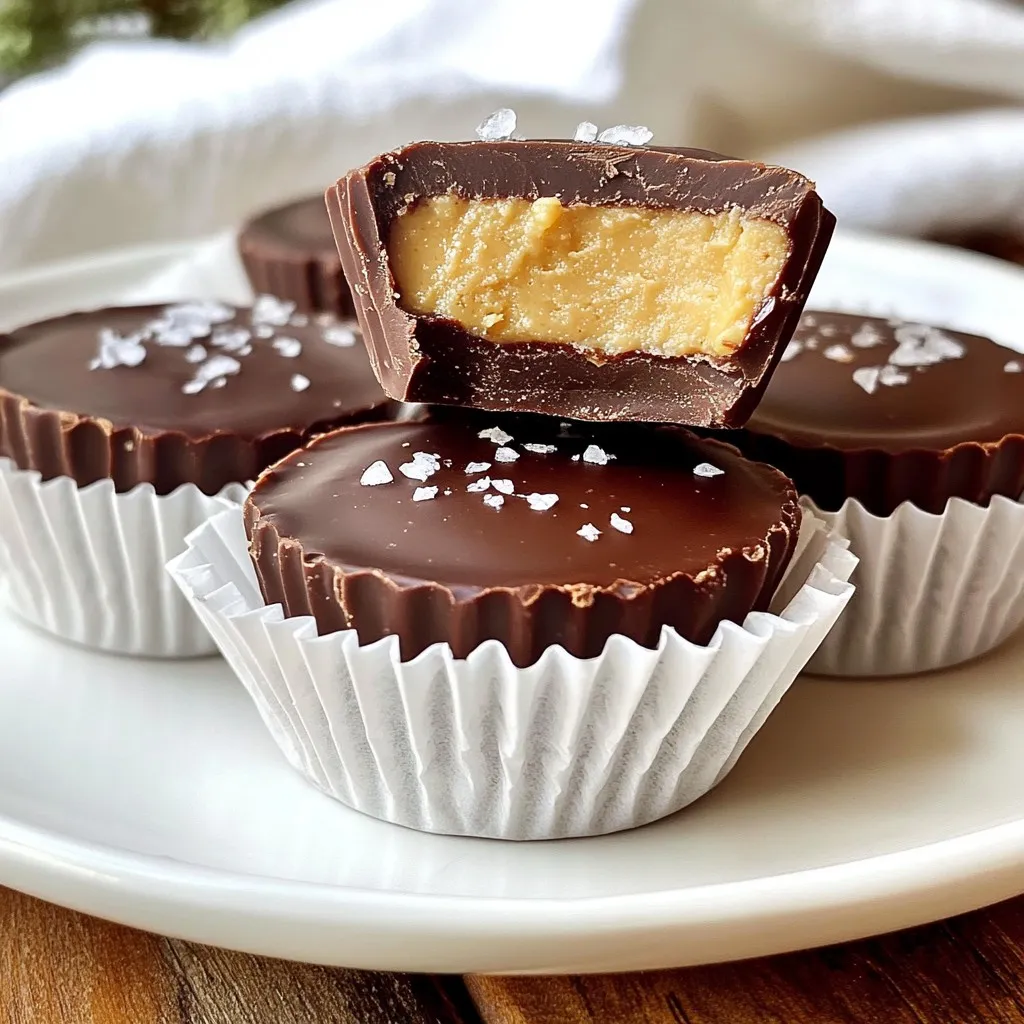
Are you ready to whip up a delicious and guilt-free treat? These Vegan Chocolate Peanut Butter Cups are simple to make and oh-so-satisfying! With just a few ingredients, you can enjoy a rich chocolate shell filled with creamy peanut butter. Whether you’re vegan or just love tasty snacks, this recipe is sure to please! Let’s dive into the steps to create these irresistible cups.
Why I Love This Recipe
- Decadent Flavor: The combination of rich chocolate and creamy peanut butter creates an irresistible treat that satisfies any sweet tooth.
- Easy to Make: With simple ingredients and straightforward steps, these vegan chocolate peanut butter cups can be whipped up quickly in your kitchen.
- Customizable: You can easily adjust the sweetness or swap peanut butter for almond butter, making it a versatile recipe to suit your taste.
- Healthier Indulgence: Made with dairy-free chocolate and natural nut butter, these cups are a guilt-free indulgence that won’t derail your healthy eating plan.
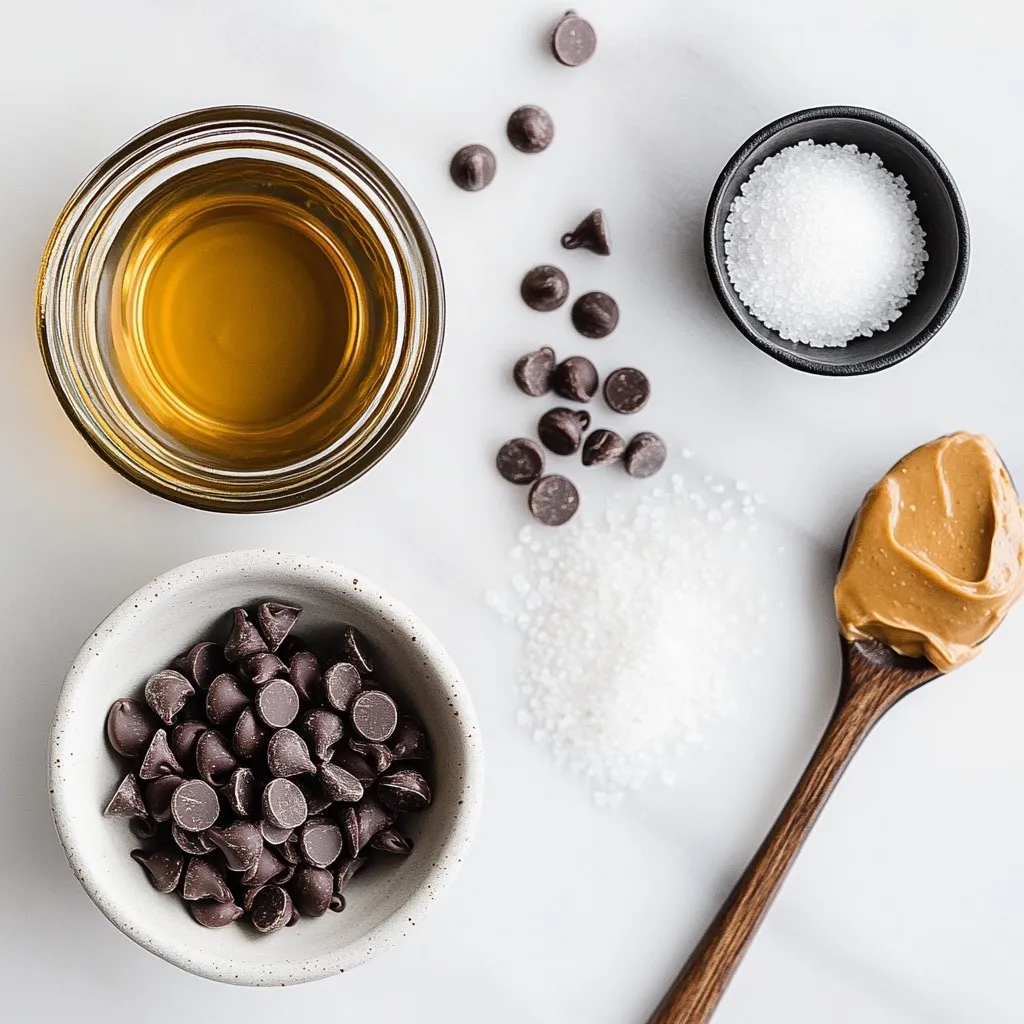
Ingredients
List of Ingredients
To make vegan chocolate peanut butter cups, gather the following ingredients:
– 1 cup dairy-free chocolate chips
– 1/4 cup coconut oil
– 1/2 cup natural peanut butter (or almond butter)
– 1/4 cup powdered sugar (adjust to taste)
– 1/4 teaspoon sea salt
– 1 teaspoon vanilla extract
– Sea salt flakes (for topping)
Vegan Chocolate and Peanut Butter Brands
When choosing vegan chocolate and peanut butter, I recommend specific brands that provide great taste. For chocolate, look for brands like Enjoy Life or Hu Chocolate. They offer dairy-free options that melt well. For peanut butter, choose natural brands like Justin’s or Teddie. They have no added sugars or oils, making them perfect for recipes like this.
Nutritional Information for Key Ingredients
Let’s break down the nutrition of some key ingredients in this recipe.
– Dairy-Free Chocolate Chips: These provide a rich flavor without dairy. They are high in antioxidants but can be high in sugar.
– Coconut Oil: This adds creaminess and richness. It contains medium-chain triglycerides, which may provide energy.
– Natural Peanut Butter: It’s rich in protein and healthy fats. It also supplies vitamins like E and B6.
– Powdered Sugar: This sweetens the mix. Use sparingly to keep treats healthier.
– Sea Salt: It enhances flavor and balances sweetness.
Each ingredient plays a role in making these cups delicious and satisfying.
Step-by-Step Instructions
Melting the Chocolate
To start, gather your tools. You need a heatproof bowl and your chocolate chips. Mix the dairy-free chocolate chips with coconut oil in the bowl. You can melt them using a double boiler or the microwave. If using the microwave, heat for 30 seconds at a time. Stir after each interval. Keep melting until you have a smooth mix.
Preparing the Muffin Tin
Next, grab a muffin tin and cupcake liners. Line each muffin cup with a liner. This step makes it easy to pop out the treats later. For smaller bites, use mini muffin tins. For larger cups, stick with standard ones.
Creating the Chocolate Shell
Now, it’s time to make the chocolate shell. Spoon a tablespoon of your melted chocolate into each lined cup. Spread it around to cover the bottom evenly. Once done, place the tin in the fridge. Let it chill for about 10 to 15 minutes, so it sets well.
Making the Peanut Butter Filling
While the chocolate is setting, let’s make the filling. In a medium bowl, mix peanut butter, powdered sugar, sea salt, and vanilla extract together. Stir until it is smooth and creamy. You can add more powdered sugar if you want it sweeter.
Filling the Cups
Once the chocolate shell is set, take the muffin tin from the fridge. Spoon a heaping tablespoon of the peanut butter mixture on top of the chocolate in each cup. Smooth the top with a spatula or the back of a spoon. Make sure it is even.
Sealing with More Chocolate
Now, pour the rest of your melted chocolate over the peanut butter filling. Ensure every bit of filling is covered. This keeps everything together. Gently tap the muffin tin on the counter to release any air bubbles.
Garnishing and Chilling
For the final touch, sprinkle sea salt flakes on top of each cup. This adds a nice burst of flavor. Place the muffin tin back in the fridge. Let the cups chill for at least 30 minutes, or until they are fully hardened. Once set, you can peel away the cupcake liners and enjoy your delicious vegan chocolate peanut butter cups!
Tips & Tricks
How to Make Perfect Chocolate Shells
To make great chocolate shells, use good dairy-free chocolate chips. I prefer using brands like Enjoy Life or Hu for their rich taste. Mix the chocolate chips with coconut oil. This mix helps the chocolate set firm. Melt it carefully in a bowl over simmering water. If using a microwave, heat it in short bursts. Stir until smooth. Pour a tablespoon into each cupcake liner. Spread it evenly to cover the bottom. Chill them in the fridge for 10-15 minutes to harden.
Adjusting Sweetness and Flavor
The sweetness of your filling can change how your cups taste. Start with 1/4 cup of powdered sugar in your peanut butter mix. Taste it and add more if you like it sweeter. You can also swap out the peanut butter for almond butter or cashew butter. This can give your cups a new flavor. Adding a splash of vanilla extract adds depth to the taste. Sea salt enhances the sweetness and gives a nice contrast.
Best Practices for Layering
Layering is key to making your vegan chocolate peanut butter cups look great. After the chocolate shell sets, spread the peanut butter filling evenly. Use a spatula or the back of a spoon for a smooth top. Pour more melted chocolate over the filling. Make sure the filling is fully covered. Gently tap the muffin tin on the counter to pop any air bubbles. This helps your layers stick together well. Finish with a sprinkle of sea salt flakes for a touch of flair and taste.
Pro Tips
- Use Quality Ingredients: The flavor of your vegan chocolate peanut butter cups will greatly depend on the quality of chocolate and peanut butter you use, so opt for high-quality dairy-free chocolate and natural peanut butter for the best taste.
- Experiment with Nut Butters: While peanut butter is delicious, feel free to experiment with other nut butters such as almond or cashew butter to create different flavor profiles in your cups.
- Customize the Sweetness: Adjust the amount of powdered sugar in the filling according to your taste preference. You can also substitute it with maple syrup or agave for a different sweetness and consistency.
- Storage Tips: Store your chocolate cups in an airtight container in the fridge to keep them fresh. They can also be frozen for longer storage; just let them thaw for a few minutes before serving.
Variations
Alternative Nut Butters
You can swap peanut butter for other nut butters. Almond butter adds a nice twist. Cashew butter gives a smooth and creamy taste. Sunflower seed butter works well for nut-free options. Each nut butter has its own flavor. This change can make your cups unique.
Adding Flavor Infusions
To make your cups even better, think about adding flavors. A dash of cinnamon or a bit of chili powder can spice things up. You can mix in some espresso powder for a coffee kick. For a sweeter taste, try adding maple syrup. These little changes can surprise your taste buds.
Using Different Chocolate Types
You don’t have to stick to just one type of chocolate. Dark chocolate gives a rich taste. Milk chocolate adds sweetness. White chocolate is a fun choice if you want a different look. Each chocolate type brings its own charm to the cups. Feel free to mix and match to find your favorite!
Storage Info
How to Store Vegan Chocolate Peanut Butter Cups
To keep your vegan chocolate peanut butter cups fresh, store them in an airtight container. This keeps air out and prevents melting. Place parchment paper between layers to avoid sticking. Store them in the fridge for the best taste and texture. They will stay firm and tasty this way.
Freezing Instructions
If you want to save some for later, freezing works well. Wrap each chocolate cup in plastic wrap. Then, put them in a freezer-safe bag or container. Make sure to remove as much air as possible. You can freeze them for up to three months. When you want to eat them, let them thaw in the fridge overnight.
Shelf Life Tips
Vegan chocolate peanut butter cups last about a week in the fridge. They may lose some texture after a few days. For the best flavor, enjoy them within three to five days. If you notice any changes in smell or taste, it’s best to toss them. Always check before you dig in!
FAQs
Can I use regular chocolate instead of dairy-free?
Yes, you can use regular chocolate. However, it will not be vegan. Dairy-free chocolate chips create a rich, creamy taste without animal products. If you want to keep it vegan, look for brands that specifically say “dairy-free.”
What are the best substitutes for peanut butter?
You can use almond butter, cashew butter, or sunflower seed butter. Each of these options brings its own unique taste. Almond butter is slightly sweeter, while sunflower seed butter has a nutty flavor. Choose what you like best!
How can I make these cups healthier?
To make these cups healthier, you can:
– Use less powdered sugar or a natural sweetener like maple syrup.
– Swap peanut butter for a nut butter with less added oil.
– Add chia seeds or flaxseeds for extra fiber and nutrients.
These changes can help you enjoy a treat while being mindful of health.
How long do these treats last in the fridge?
These treats last about one week in the fridge. Keep them in an airtight container to maintain freshness. If you want to enjoy them longer, consider freezing them for up to three months!
You learned how to make vegan chocolate peanut butter cups with simple steps. We covered the ingredients, melting chocolate, and creating the perfect shells. I shared tips for adjusting flavors and ways to store your treats.
Making these cups is fun and easy. You can customize them to fit your taste. Enjoy your sweet treats, and share them with friends for even more fu